
Walking into a home where every room is packed floor to ceiling can feel impossible to tackle. Pathways are narrow, surfaces are buried, and it is hard to tell where the clutter ends and the hazards begin. If you are wondering how to clean out a hoarder house, the most important starting point is not a trash bag. It is a plan.
Rushing in without one can lead to injuries, lost documents, and piles that simply move from room to room. A safe cleanout starts with assessing the property, then moves through sorting, removal, cleaning, and a final review. This guide walks through each stage, explains the hazards to watch for, and shows when it makes sense to bring in help.
Start With a Safe Plan Before Removing Any Clutter
Safety has to come before speed. Before anything is moved, look at access routes, utilities, structural conditions, pets, pests, and anything that could be hazardous. A hoarder house cleanout goes better when the risks are known in advance, and extreme clutter cleanup is much easier to manage once the dangerous areas are identified.
Assess the Property Before Starting the Cleanout
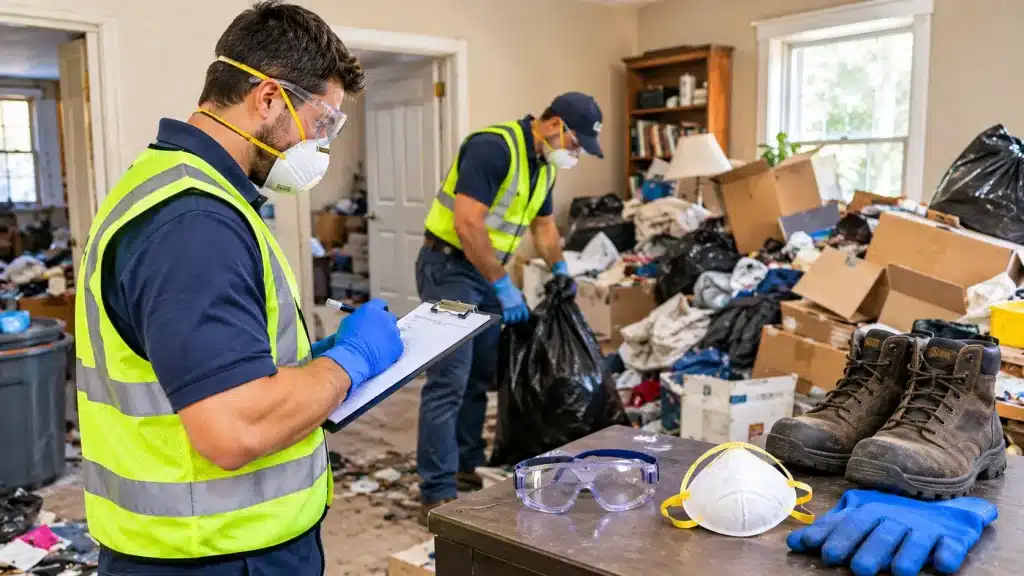
Walk through the home and note the condition of each room, pathway, exit, and utility area. Look for blocked doors, damaged floors, signs of leaks, and areas that are too crowded to enter safely. This inspection helps you decide where physical cleanup can begin without putting anyone at risk.
Protect Yourself From Dust, Mold, Pests, and Sharps
Heavily cluttered homes often hold dust, mold spores, droppings, and hidden sharp objects. Wear gloves, sturdy closed-toe shoes, eye protection, and a properly fitted respirator mask. Never reach blindly into piles or bags, since broken glass and needles can be buried inside.
Keep Emergency Exits and Walkways Accessible
Clear a safe path to every exit first, along with stairways and the electrical panel. Open walkways reduce the risk of falls and make it possible to get out quickly in an emergency. They also give you room to carry items out without straining.
Separate Unsafe Materials From Ordinary Household Clutter
Chemicals, contaminated materials, unknown liquids, damaged containers, and medications should not go in with regular trash. Set them aside in a separate area and label them. Many of these items require special disposal, so keeping them apart prevents accidents and contamination.
Set Clear Goals for What the Cleanout Must Achieve
Decide what the project needs to accomplish. The goal could be light decluttering, full property clearance, sanitation, or preparing the home for sale. A clear goal helps you choose which rooms come first and how much help you will need.
Decide Which Areas Need Professional Cleanup Assistance
Some rooms are beyond what ordinary household cleaning can handle. Heavy contamination, large volumes of contents, or conditions that need sanitation often call for professional cleanup assistance. Deciding this early prevents you from starting a job that is unsafe to finish.
Build a Step-by-Step Plan for the Cleanout Process
A large cleanup feels manageable when it is split into stages. A logical order prevents random removal and repeated work. This sequence works for most hoarding house cleanup projects, whether it is a single floor or a full hoarder property cleanup handled with house cleanout services.
Choose a Starting Room Based on Safety and Access
The first area should improve access and safety, not simply be the room with the most visible clutter. A hallway, entryway, or path to the kitchen is often a better place to begin. Opening these areas makes the rest of the work easier to carry out.
Establish Sorting Zones Before Moving Large Volumes
Set up designated spots or containers for keep, donate, recycle, dispose, and review items. Having these in place before you start makes sorting household belongings more consistent. Without them, items tend to be moved around with no clear destination.
Remove Immediate Trash Before Deeper Organization
Obvious trash, such as food waste, packaging, and broken items, can be removed in controlled stages. Take care not to discard documents, valuables, or sentimental possessions mixed in with it. Checking each bag or pile before it goes out saves regret later.
Work Through One Manageable Area at a Time
Finish a defined section before moving to the next one. This keeps clutter from being shifted repeatedly from room to room. Completing small areas also gives a sense of progress, which helps when the project is long.
Clean Each Area After Its Contents Are Removed
Once a space is empty, sweep, vacuum, and wipe surfaces. Some conditions, such as heavy contamination or lingering odors, may need specialized sanitation. Cleaning each area as you go means you are not left with a dirty home at the end.
Perform a Final Walkthrough Before Calling the Job Complete
A last inspection catches forgotten belongings, remaining trash, blocked access points, and spaces that still need cleaning. If possible, have a family member or the property owner join you. They are more likely to notice items that should not have been left behind or removed.
Identify Hazards Before Entering Heavily Cluttered Rooms
Hazards are what separate a hoarded home from an ordinary messy one. Recognizing them early shows you when severe clutter removal can be done carefully and when professional hoarding cleanup is the safer choice. Treat every room as potentially unsafe until it has been checked.
Look for Structural Problems Underneath Heavy Clutter
Years of stacked belongings can overload floors and weaken ceilings and stairs. Unstable piles may shift or collapse when disturbed. Check for sagging, cracks, or soft spots before moving heavy objects.
Watch for Mold, Moisture, and Poor Indoor Conditions
Hidden leaks and poor airflow can lead to mold behind and beneath stored items. A musty smell, visible discoloration, or damp materials are warning signs. These conditions may need a specialist to assess before cleaning continues.
Treat Pest Infestations and Animal Waste Seriously
Rodents, insects, droppings, and nests can create biological contamination that needs specialized cleanup. Do not sweep or disturb droppings without proper protective equipment. When contamination is widespread, it is best handled by trained professionals.
Handle Sharps, Chemicals, and Unknown Materials Carefully
Needles, broken glass, fuels, medications, and unidentified substances should never go straight into ordinary trash bags. Use puncture-resistant containers for sharps and keep chemicals in their original containers. Ask your local waste authority how to dispose of them correctly.
Protect Electrical Systems and Utility Access
Overloaded outlets, damaged cords, and blocked panels increase the risk of fire and shock. Keep the utility shutoffs reachable at all times. If wiring looks damaged, avoid using the circuit until it has been inspected.
Know When a Room Should Not Be Cleaned Alone
Some rooms are not safe for one person to enter. Knowing how to handle hoarding dangers can help you recognize the warning signs, including unstable piles, strong odors, or contamination. When you see them, stop and bring in trained help.
Sort Household Belongings With a Clear Removal System
Sorting is the part that takes the most time and the most patience. A consistent system keeps the project from stalling and protects important items. These methods help with decluttering a hoarder house while keeping the process organized and respectful of what the belongings mean to the people involved.
Create Keep, Donate, Recycle, and Disposal Categories
Clear categories make decisions easier and stop items from being moved repeatedly. Use labeled boxes or marked areas for each group. Every item should end up in one of them before it leaves the room.

Set Aside Documents and Potentially Valuable Belongings
Financial records, identification, legal papers, photographs, collectibles, and jewelry deserve separate handling. These items are often buried among ordinary clutter. Keep a dedicated container for them so nothing important is thrown out by mistake.
Use a Review Category for Difficult Decisions
A temporary review pile prevents rushed choices when someone is unsure about an item. Items in this group can be revisited once the main work is done. This takes pressure off the person making decisions.
Handle Sentimental Items Without Rushing the Process
Photographs, letters, and memorabilia often carry strong emotional meaning. These items may need more time than ordinary clutter. Allow room for slow decisions, especially when the owner is involved.
Remove Clearly Unwanted Items in Controlled Loads
Take out clearly unwanted items in manageable batches rather than building large piles elsewhere in the house. Staged removal keeps work areas open. It also makes removing unwanted items less overwhelming.
Keep Sorted Items From Becoming New Clutter
Labeled containers, set zones, and quick removal keep the sorting process from simply relocating clutter. Move donation and disposal items out of the home on a regular schedule. Otherwise, the sorted piles can turn into a new problem.
Remove Trash and Unwanted Items in the Right Order
Once sorting decisions are made, removal should follow a sequence. Trash removal usually comes first, since it creates space and lowers health risks. Taking out bagged waste, then bulky objects, then reusable items, and finally items that need special disposal keeps a cluttered house cleanout moving without rework. Removing unwanted items in the right order also prevents blocked pathways. A practical sequence looks like this:
- Remove bagged trash and obvious waste from the home.
- Take out broken or unusable bulky items.
- Load donation and reusable items for transport.
- Set recyclables aside for the proper drop-off.
- Handle chemicals, sharps, and special items last, using the correct disposal method.
Clean Heavily Cluttered Areas After Contents Are Removed
Clearing belongings is only part of restoring the home. Cleaning heavily cluttered areas means dealing with years of dust, dirt, and grime that built up under and behind the clutter. Floors, walls, and surfaces usually need thorough cleaning before the room can be used again.
Hoarder home cleaning often starts with sweeping and vacuuming, then moves to wiping surfaces and washing floors. Odors may linger in carpets, upholstery, and walls, and hidden debris often turns up once furniture is moved. If you find mold, pest damage, or contamination, stop and arrange specialized remediation rather than trying to clean it away yourself.
Handle Furniture, Appliances, and Bulky Items Safely
Bulky items are often the hardest part of the physical work. Furniture removal in a hoarded home can be risky because pieces may be buried, overloaded, or blocked in by other items. Mattresses, appliances, overloaded shelves, and oversized belongings should be moved with care. Some homeowners look into DIY furniture removal for small pieces, but heavy or buried items are safer left to a trained crew.
Empty shelves and cabinets before moving them, and clear a path to the door first. Never lift heavy objects alone, and use proper lifting methods or equipment. When the volume of large items is high, house cleanout services can handle the removal so you avoid injury and property damage.
Work Through Garages, Basements, and Storage Areas
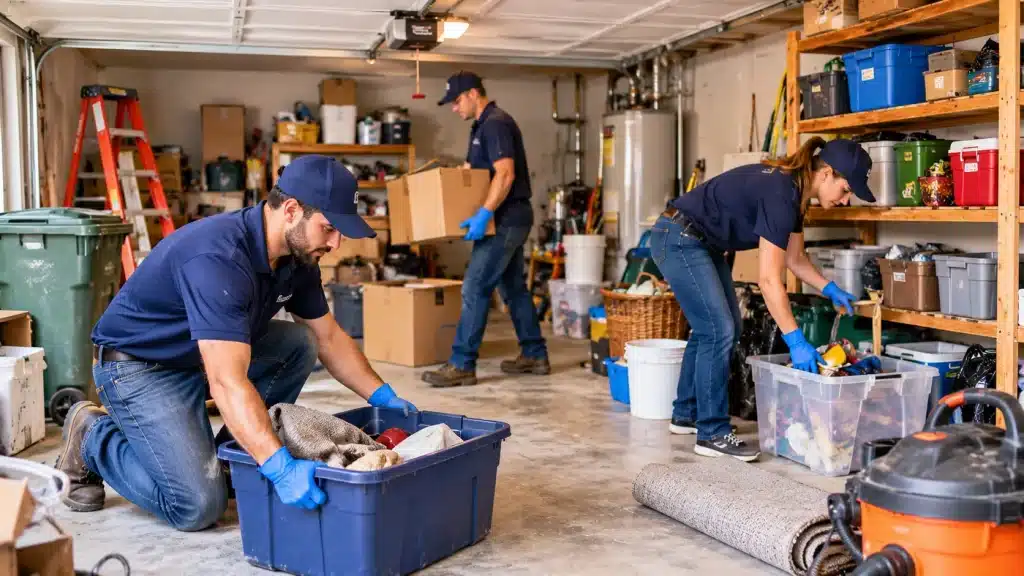
Garages, basements, and storage areas are often left until the end, even though they may hold as much as the main rooms. Stored boxes, tools, seasonal belongings, old furniture, and debris can fill these spaces. Moisture, poor lighting, and tight access can make them harder to work in. Treat them as part of the same plan rather than as an afterthought.
A garage cleanout benefits from clearing a working area first, so you have space to sort. A guide on how a professional approaches a garage clean up can show what to expect. A basement cleanout needs extra attention to dampness, mold, and unstable stacks, and chemicals or fuels stored in either space should be separated for special disposal.
Know When Professional Hoarding Cleanup Is Needed
Not every hoarded home can be cleaned by family members alone. When the conditions go beyond ordinary decluttering, professional hoarding cleanup is the safer and often faster option. Hoarding cleanup services have the equipment, training, and protective gear to handle hazards that are unsafe for a household cleanup. Understanding typical hoarding cleanup costs can also help you plan and decide when to call for professional cleanup assistance.
Consider professional help in situations like these:
- Biohazards or contamination from waste, bodily fluids, or animal droppings.
- Structural concerns such as damaged floors, ceilings, or stairs.
- Rooms that are inaccessible or blocked from floor to ceiling.
- Extensive mold or persistent moisture problems.
- Pest infestations that have spread through the property.
- Overwhelming volumes of debris that cannot be removed safely by hand.
Manage Donations, Disposal, and Reusable Belongings
Many items leave the home in different directions. Usable belongings may be donated, while others are recycled or discarded, and some need specialty handling. Good unwanted item disposal means matching each item to the right destination. Sorting early helps, and a guide to sorting recyclable household waste can make this part easier.
It can also help to keep simple records of what was donated or disposed of, especially when family members or legal parties are involved. Items usually go to one of these destinations:
- Donation: clean, usable clothing, furniture, kitchenware, and household goods.
- Recycling: paper, cardboard, metals, glass, and certain plastics or electronics.
- Disposal: broken, soiled, or unusable items that cannot be reused or recycled.
- Specialty waste: chemicals, fuels, batteries, medications, and other regulated materials.
Avoid Common Mistakes During a Hoarder House Cleanout
Most problems during a hoarder house cleanout come from avoidable choices. Knowing them ahead of time makes severe clutter removal safer and helps house cleanout services and family helpers work together smoothly.
- Rushing decisions. Fast choices lead to regret, especially with sentimental items. Use a review pile instead.
- Mixing categories. Combining keep, donate, and trash items causes confusion and lost belongings.
- Ignoring hazards. Skipping safety checks for mold, pests, or structural damage puts everyone at risk.
- Moving clutter between rooms. This creates new piles without solving anything. Finish one area before the next.
- Overlooking storage spaces. Garages, basements, sheds, and attics often hold more than expected.
- Underestimating the cleanup. Heavy contamination and large volumes may call for professional help from the start.
Final Thoughts on Cleaning Out a Hoarder House Safely
Knowing how to clean out a hoarder house comes down to preparation, patience, and safety. Start with a careful assessment, protect yourself, clear exits, and set aside hazardous materials. From there, work through the property in stages, sort belongings with a clear system, remove trash in the right order, and clean each area once it is empty. Taking it one room at a time keeps the project manageable.
Some homes simply carry too many risks or too much volume to handle alone. If the property has serious hazards, contamination, or overwhelming clutter, reach out to Explicit Junk Services for professional hoarding cleanup. A trained team can help you clear the space safely and respectfully.
FAQs About Cleaning Out a Hoarder House Safely
A severely cluttered property can involve safety, sorting, removal, and cleaning challenges that are difficult to manage alone. These FAQs address common concerns readers may still have after reviewing the step-by-step process.
It depends on the size of the home, the volume of belongings, and the condition of the property. A small, lightly cluttered space may take a few days, while a large or heavily contaminated home can take much longer. Sorting and safety checks also add time, so any estimate should be treated as approximate.
Start with obvious trash, food waste, and anything blocking exits and walkways. Clearing these first improves safety and gives you room to work. Hazardous materials should be set aside separately for proper disposal.
It depends on the conditions. Light to moderate clutter may be manageable with proper protection and a plan. Mold, pests, contamination, or structural damage make professional help the safer choice.
Set up a dedicated container for documents, identification, photographs, jewelry, and keepsakes before sorting begins. Check pockets, books, and boxes before discarding anything. Take extra time with sentimental items and use a review pile when you are unsure.
Usable items may be donated or reused, while recyclable materials go to the proper facilities. Broken or unusable items are disposed of, and hazardous materials need specialty handling. Ask your provider how they handle each category.