

Many homeowners avoid interior renovation because they do not know where to begin. Knocking out a wall or pulling up old tiles feels risky without the right knowledge. The light demolition process explained here removes that uncertainty. It covers what to expect before, during, and after the work. Whether you are updating a kitchen or clearing out a bathroom, this guide gives you a clear and safe path forward.
Light demolition is not the same as tearing a building down. It is a focused and controlled removal of interior materials. Think of it as clearing the old to make room for something better. Cabinets come out, tiles get pulled up, and drywall gets removed in targeted sections. When done with care and the right prep work, it goes smoothly and sets up your renovation for real success.
Basics Of Light Demolition Work For Home Projects
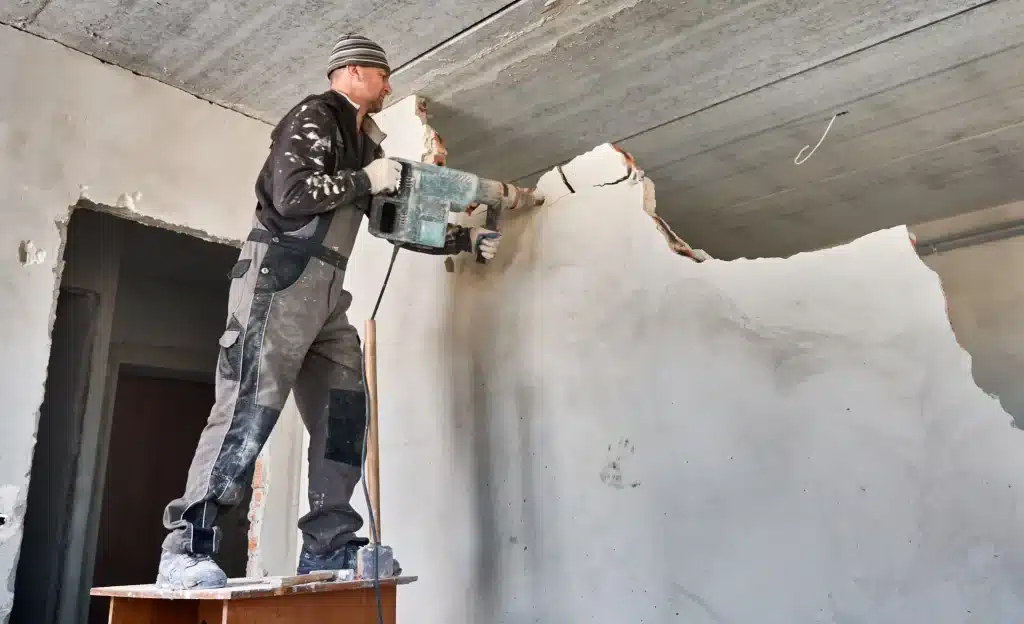
Most people picture heavy machinery and falling walls when they hear the word demolition. Light demolition is very different. It focuses only on interior materials that need removal before renovation can begin. Many homeowners combine this work with clutter removal for homes to create a cleaner space before upgrades start.
The residential demolition process at this level covers things like removing drywall, flooring, cabinets, and fixtures. No structural walls come down. No load-bearing elements are touched. A homeowner in Atlanta remodeled an entire first floor by removing only cabinets and old tile. The walls stayed intact, and the project finished in three days.
Site Check And Prep Before Demolition Work Starts
Skipping a site inspection is one of the fastest ways to create a costly problem. Pipes, wires, and gas lines hide inside walls and floors. Knowing what is there before the demo begins keeps everyone safe. Some property owners also schedule rental property cleanouts before demolition to remove unwanted belongings and improve site access.
Utility Lines And Risk Inspection Steps
Before anything gets removed, turn off the electricity to the work zone at the breaker. Shut off water valves near plumbing areas. If gas lines run through the space, call your utility provider first. A stud finder and wire detector help locate hidden elements. These tools cost under thirty dollars and can prevent serious damage or injury during interior demolition steps.
Preparing Safe Work Zones Properly
Once utilities are handled, close off the demo area from the rest of the home. Use plastic sheeting over doorways to block dust. Lay down drop cloths to protect the flooring in adjacent rooms. Remove furniture and decor at least six feet from the work area. Clear paths to exits in case something unexpected happens mid-work.
Tools And Gear Used In Small Demo Work Process
A proper demolition work process depends on using the right tools for each task. The right tool saves time and lowers risk. Wrong tools can damage surfaces or slow progress. Good planning helps match each tool to the job so work stays safe and controlled from start to end. Large projects sometimes require commercial junk removal after demolition debris starts accumulating.
Manual Tools For Basic Removal
Manual tools help with light and careful work. Pry bars lift panels and trim. Hammers break small sections. Chisels remove tight material. Utility knives cut drywall and flooring edges. In one home project a simple pry bar helped remove old cabinets without breaking the wall surface.
Power Tools For Tough Materials
Power tools handle strong or thick materials. A reciprocating saw cuts wood and pipes quickly. An oscillating tool works in tight corners. A rotary hammer removes tile much faster than hand tools. These tools improve speed in the small demolition work process and reduce physical effort.
Safety Gear For Worker Protection
Safety gear protects from dust and injury. Dust masks block fine particles. Goggles protect eyes from flying debris. Gloves prevent cuts. Steel-toe boots protect feet from heavy drops. Knee pads help during floor work. One worker avoided injury because proper gear was used during tile removal.
Protective Equipment For Full Safety
A hard hat is useful for overhead work. Ear protection helps with loud tools. Dust control masks improve breathing safety. These items make safe demolition methods more reliable. Using full gear reduces risk and keeps the light demolition process safer in every type of home project.
Full Interior Demolition Steps From Start To End
A controlled workflow prevents damage and keeps the project on time. These interior demolition steps apply to most small-scale residential jobs. In larger buildings, teams may coordinate with office cleanout services before demolition begins to clear furniture and equipment safely.
Step 1: Planning And Site Review
Walk through the full area before any work begins. Mark walls, floors, and fixtures that are coming out. Note anything that needs to stay. Take photos for reference. A clear plan made before demo begins saves hours of confusion during removal.
Step 2: Safety Setup And Preparation
Set up your dust barriers and turn off the right utilities. Put on your safety gear before picking up any tool. Ventilate the space by opening windows if possible. Check that your exit path is clear and your first aid kit is nearby.

Step 3: Controlled Material Removal
Start from the top and work down. Remove ceiling fixtures first then wall-mounted items. Pull out cabinets before tackling tile or flooring. Work in sections and remove debris as you go. Letting material pile up creates tripping hazards and slows your progress.
Step 4: Debris Clearing And Cleanup
Sort debris into categories as you work. Wood and drywall go into one pile. Metal goes into another. Tile and concrete into a third. This sorting makes disposal easier and can reduce your hauling costs. Sweep and vacuum between passes to keep the site manageable.
Step 5: Final Inspection And Disposal
Once removal is done, walk through the space again. Check for exposed nails, loose wire ends, or cracked sub-flooring. Anything that could cause injury before renovation begins gets addressed now. Load debris into a rented dumpster or haul bags to a licensed disposal facility.
Safety Rules To Follow During Demolition Work
Safe work is the base of any home teardown job. The light demolition process needs clear rules to protect people and space. Small mistakes can lead to injury or damage. Using safe steps helps control risk and keeps the job smooth from start to finish in real home projects. Safety becomes even more important during hoarder house cleanup projects where clutter can hide hazards.
Wear Proper Safety Gear
Workers must wear gloves, helmets, and eye protection. This protects from sharp edges and falling debris. In one small home project, a worker avoided injury because safety glasses stopped dust from entering the eyes. Safe demolition methods always start with the right gear in place before any work begins.
Control Dust And Debris
Dust spreads fast in indoor work. Plastic sheets and seals help block the spread. One home used basic covers and avoided dust damage to furniture. This shows how small protection steps improve the light demolition process and keep the space clean during work.
Check Utilities Before Work
Always turn off the water gas and power before starting. This avoids shocks, leaks or fire risk. In one case, a hidden wire caused sparks when not checked. A proper small demolition work process includes full utility check for safety first.
Use Safe Work Techniques
Do not rush or force walls and fixtures. Controlled removal reduces accidents. Safe demolition methods focus on slow and planned steps. This helps avoid structural damage and keeps workers safe during every stage of the project.
Kitchen And Bathroom Demo Work Explained Simply
Kitchen and bathroom renovation is where most residential light demolition happens. These rooms have more connections to utilities than any other space in the home. Homeowners often arrange estate cleanout services before renovation so old furniture and unwanted belongings can be removed efficiently.
In kitchens, start by removing upper cabinets before lower ones. Disconnect the dishwasher and range hood before pulling anything from the wall. Turn off the water supply before touching sink plumbing. Countertops come off after the lower cabinets are cleared.
Bathrooms need extra caution around tile and fixtures. Old bathroom tile often contains materials that require careful handling, depending on the age of the home. Test for hazardous materials before breaking up floors or walls that have not been touched in decades. Interior demolition steps in bathrooms move more slowly but must be done with precision.
Waste Removal and Clean-Up After Demolition Work
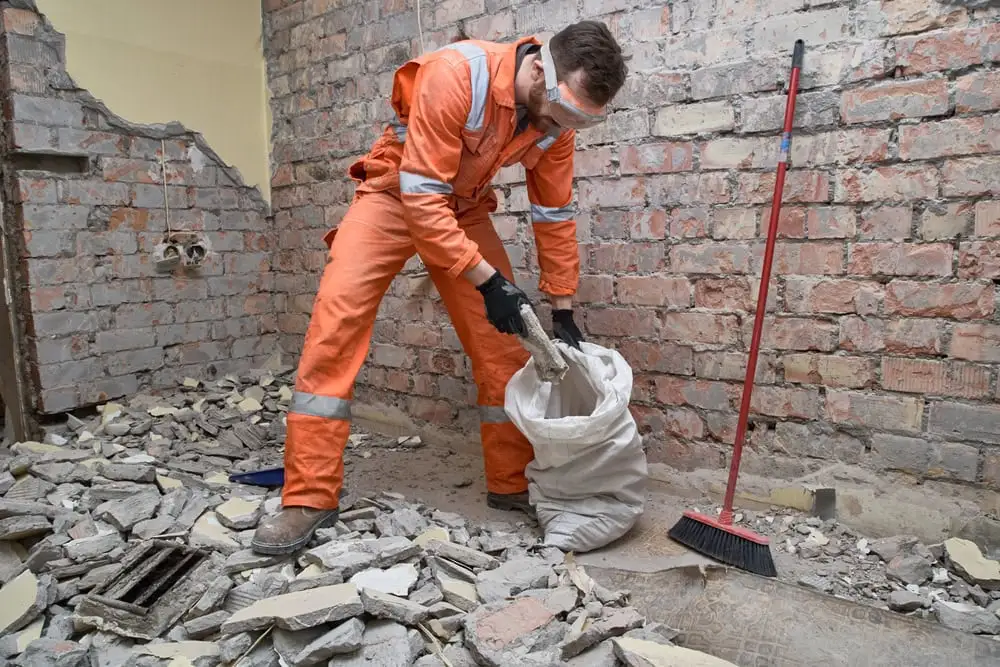
Debris does not disappear on its own. A clear disposal plan is part of every residential demolition process that runs without problems.Sort materials before loading. Drywall, wood, tile, and metal each have different disposal paths. Many salvage yards and recycling centers accept specific materials for free. Some even pay for clean metal scraps or solid wood framing pieces.
For full site cleanup, rent a dumpster sized to your project. A small bathroom job fits a ten-yard container. A full kitchen gut needs at least twenty yards of material. Bag what you can and protect your yard or driveway from heavy loads during transport.
Common Mistakes In Light Demolition Projects
The light demolition process explained helps people avoid simple but costly errors. Many issues start when work is rushed or planned poorly. A small mistake can slow the whole project and raise costs. Careful steps and safety checks keep work smooth and reduce damage during home renovation work.
- Cutting walls without checking wires first
This can damage hidden power lines and stop work. - Removing load parts by mistake
This may weaken the structure and create safety risk. - Not turning off water or power
It can cause leaks shocks or major repair costs. - Skipping debris sorting
Mixed waste makes cleanup slow and harder to manage. - Ignoring dust control
One small open space can spread dust across the home. - Poor planning of work order
Rushing steps often leads to rework and extra time loss.
Cost And Time Needed For Demolition Projects
Cost depends on the size of the space, the type of materials being removed, and whether you hire professionals or do it yourself.
A single bathroom demolition typically runs between three hundred and eight hundred dollars when hiring a crew. A full kitchen gut can range from one thousand to three thousand depending on fixture complexity and your location. DIY saves money on labor but adds time and requires renting tools.
Time follows a similar pattern. A bathroom clears in half a day to one full day. A kitchen takes one to three days. Larger whole-room projects or those with unexpected utility issues can stretch longer. Budget both time and money with a ten to twenty percent buffer for surprises.
Preparing Space After Demolition Work Is Done
The job is not finished when the last piece of debris leaves the room. Preparing the space correctly sets up your renovation for a cleaner and faster start.
Sweep and vacuum all surfaces thoroughly. Wipe down exposed studs and sub-floors if they are staying. Check for moisture, mold, or rot now before new materials go in. These issues are much cheaper to fix before renovation begins than after.
Mark any utility lines that are now exposed. Tag them clearly so contractors know where to work and where to avoid. Cover open areas with plastic sheeting if the renovation does not start immediately. Protecting the exposed space keeps it clean and ready.
Final Overview Of Safe Demolition Project Flow
A well-planned light demolition process, explained clearly from start to finish is the foundation of any successful interior renovation with Explicit Junk Service. Safety inspection comes first. Tools and gear get selected based on the job. Materials come out in a controlled and logical order. Debris gets sorted and removed responsibly. None of these steps are optional. Each one protects the people doing the work and the property itself.
The residential demolition process works best when it follows a structure. Rushing causes damage. Skipping safety steps creates risk. But when done right, light demolition opens up a space and gives contractors or homeowners a clean canvas to work with. Whether you handle it yourself or bring in a crew, the steps in this guide give you the knowledge to move forward with confidence and care.
Questions About Light Demolition Work Answered Here
It covers the removal of non-structural materials like drywall, tile, cabinets, flooring, and fixtures. No load-bearing walls or structural elements are touched
Most interior-only projects do not need a permit. However, rules vary by city. Always check with your local building department before starting any significant removal work.
A single room typically clears in one to two days. Larger spaces or those with complex utility work can take up to five days, depending on scope.
Yes, for small jobs when utilities are off, and proper gear is worn. For anything involving gas lines or load-bearing walls, hire a licensed professional.
Sort materials by type, then use a rented dumpster or a licensed hauling service. Recycling centers accept many materials and reduce landfill costs.